Heh.
As if he's so modern and fancy. Well. He is now.
I'm stalled on the master bathroom project as I work things through in my head to wrap it up but I'll try to get in an update.
My head is a-whirl with thoughts on reworking the upstairs hall though Mike likes it as-is. Or maybe the dining room.
Waiting on the weather to improve so I can power up the swanky planer and get the stair project steamrolling.
We ordered a new couch* because the Joybird is a total piece of sh*t. But, now, pondering the living room......
Lots of projects brewing and bubbling in my head though Mike made a request to not invent projects. Mm hm. Cough, I'll try, babe, cough, I'll try.
So lots but nothing.
With the hullabaloo around concrete projects in these parts (yes there are others upcoming, heh), it seemed time to direct my attention to Finn's needs and his needs included a new water bowl stand.
His old one was yeesch so gross and considering the amount of water that spews forth every-freakin'-where when that giant mouth of his laps it up, the wood was starting to rot.
I will say, I am astonished at how well the Plasti Dip* spray held up. It's 2022 and I built that thing seven years ago? Yeah, wow. I did respray it once but mostly because I hadn't gotten enough on the first go around.
So if you recall, here's his old one.
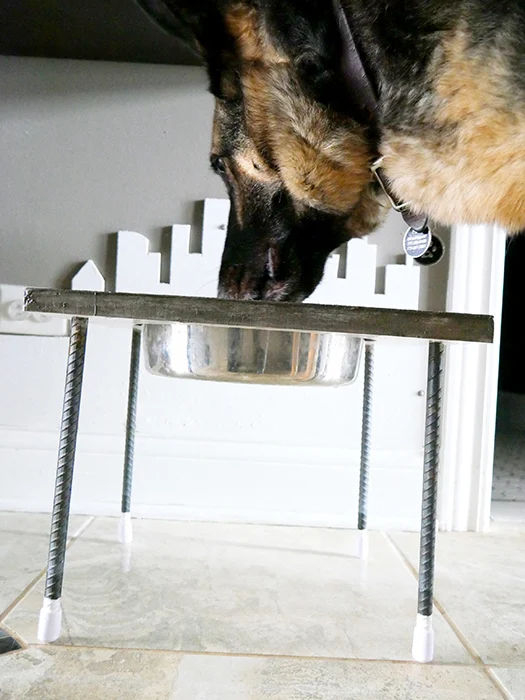
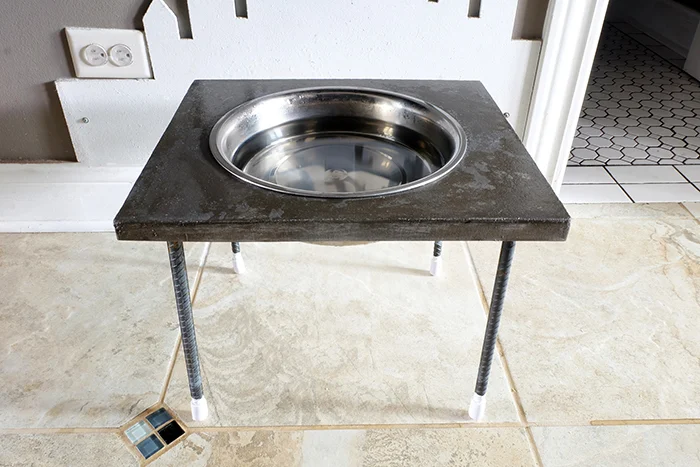
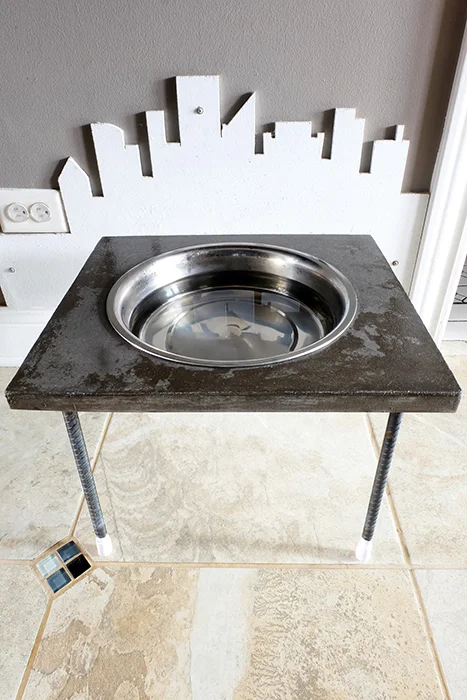
And today, here's his new one. He's grown. He's matured. His tastes have changed. He's a modern dog now.
Too, he understands the cost-effective value of sturdier materials, how this will hold up over time. Smart boy.
Thankfully there was a bunch less math involved in this one. Whew.
What did I use for this project? Well.....
- a laminate shelf
- a 1" thick by 2' x 2' foam panel*
- scrap wood
- clamps*
- 1/2" x 12" rebar*
- leftover mesh
- countertop concrete mix*
- spray release*
- hot glue*
- hot glue gun*
- caulk*
- Plasti Dip spray
- various random screws and such
- Finn's water bowl*
Home Depot has that foam panel* as well. Pretty much any home improvement store should. Obviously Menards does.
And yes, it's the same countertop concrete mix as the master bath vanity. And yes too, making this water bowl stand for our pooch pretty well follows that same routine. Similar but different.
Just prior to this project, I had replaced the shelves in the kitchen window. I need to do another Variety Pack post....
So I had these eighteen inch deep by twenty four inch long shelf panels lingering about. Perfect! The base for this project. And by base, I mean the top.
Because, if you remember, when you pour into something, the bottom is the top.
The foam panel, that was for the sides and for the middle circle. I measured the existing opening on the old water bowl stand and hence discovered that an Ikea plate we have is exactly the right diameter. Sweet.
Ok, traced the Ikea plate onto the foam and used the bandsaw to cut the foam circle. A little bit of sanding the edges and voila, the middle! No bandsaw? No problem. Use a jigsaw* or hand saw.*
A bit of layout on the shelf panel, a dab of hot glue, and stick the circle down in the center of the layout.
Next, cut the sides out of the foam. I should have made an effort to cut them straight but I didn't. A bead of hot glue, and the sides are glued down. Note: hot glue melts this foam.
The finished size for the top randomly became sixteen by fourteen.
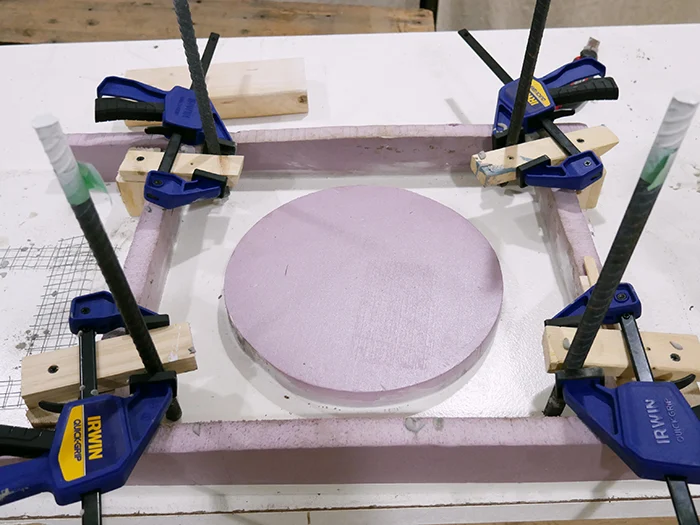 |
| I am missing a bunch of photos, my apologies but you can get the gist of what I'm saying above in this shot. |
All right.
Next, caulking. Caulk anywhere liquid could leak through. And as we learned in the solar light post, anything that's inside the mold form will reflect back in the finished product, therefore I took the time to reaaaalllly clean up that caulk, scraping and trimming and tidying. It's gotta be 100,000% perfect for Finn after all.
Spray everything with spray release.
Next was figuring out how to suspend the rebar legs so they wouldn't poke through the top plus stay upright while the concrete sets.
There are probably better ways to do this but using a bunch of scrap wood and some clamps, I set the rebar an inch and a half in from the sides, then suspended them at a relatively even height.
Oh before that, I taped off the ends and sprayed them with multiple coats of Plasti Dip spray.
Finally, the concrete. This took me three tries actually and thankfully third time was a charm. I tried using repair patch concrete. Fail, it fell apart. Tried regular concrete. It was expired, didn't set right. Sprang for the counter stuff, it worked.
Mix it according to the bag, or thereabouts since we're not using the whole bag here. Pour, stick in some metal mesh if desired, let it set.
Carefully pull apart parts of the mold (in case you have to re-pour) and voila! A water bowl stand for the pooch in concrete!
The center circle did pop out with the whole thing so just a knife to cut it a bit, push it out.
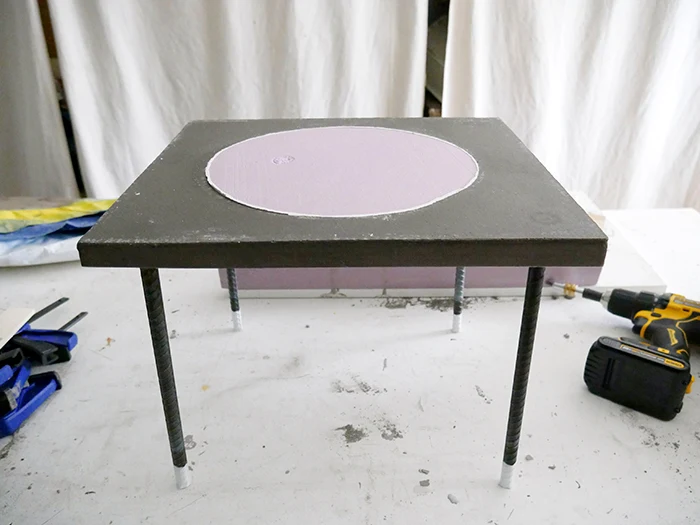 |
| Great thing about foam: it's easily cut. It's easily cut into the circle shape then easily cut when it gets stuck and needs to be removed. |
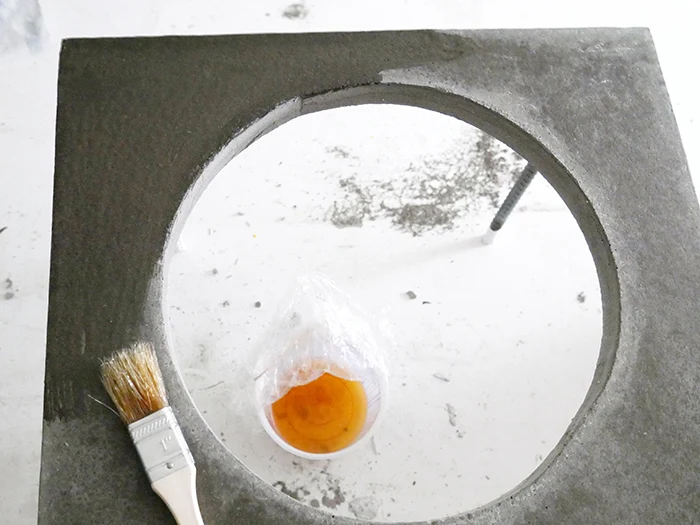
Seal it up using the same recipe as the solar lights, then I did a coat of paste wax* though you could do car wax* or whatever you see fit. (Note: it seems the paste wax is not adhering, maybe don't use that.)
A package of furniture tips* to keep the ends extra safe despite not being the look I want and we're all set!
Finn didn't even notice.
That dog slobber splash blocker has been holding on, hanging in there. It needs a bit of damage control repair and a re-spray but still doing its job.
Mike came home and was all "oooooOOoooohhhh, look at that. Huh. Very nice! You could sell that." So if you wanna buy one, let me know.
And there we have it, a brand new spiffy modern water bowl stand for our pooch, sturdily built out of concrete and rebar!
*The couch link is an Interior Define 15% off referral link. The foam panels are Lowes and Home Depot affiliate links. The clamps, rebar, and countertop concrete mix are Home Depot affiliate links. The jigsaws, hand saws, and caulk are Lowes. The Plasti Dip, spray release, hot glue, glue guns, water bowls, paste wax, car wax, and furniture tips are Amazon affiliate links. Mwah, thanks! Please see the "boring stuff" tab for more info.







Post a Comment
Please no spam or links, thanks!