Can I just open with I am pooped? Yeah I am pooped. Wiped. As I sit here tip-tappin' away on this keyboard, some significant progress has occurred on The Stair Project. Bruised, scratched, pooped, kind of in shock I am but!, I did not fall down the stair! #winner
Which is great, the progress! Omg, how long has it been since I've been meaning to get to this stair project, spurning Mike's hints and prods and direct demands? Long time.
So last we left off, oh gosh, last September?!, how embarrassing, the design for the stair was taking shape. The Pine was purchased. The planer* was gifted to me from Mike (thank you thank you thank you). Planning, scheming, pondering happening daily.
It was a lot.
See, we use the upstairs, heh. Nothing on the stair could be wet for any length of time. Plus fur. Dog fur. Dog fur everywhere.
I devised a strategy where I would prep all the treads ahead of time and come installation time, just swap old for new. And cross my fingers.
A long time ago, Mike and I, one evening, entertained making the stair open so any idea for the risers was backburner'ed. I'd only know once I pulled more old treads off if it was possible.
So ok, let's prep the treads! *clap clap*
This took a sh*tload of thought and deliberation too because a.) pine is a soft wood; b.) what would the final appearance of the wood be; c.) how do I make this non-slip for dog feeties and people feeties as my goal was now no runner* thanks to this incredible wood; d.) pine is soft wood.
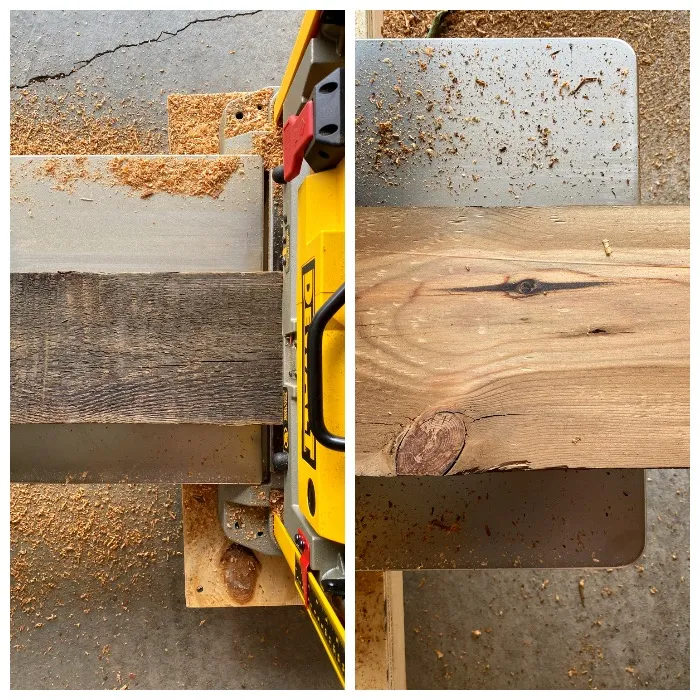
First, as I mentioned in the stair project part one, the pine boards went through the planer.
Now.
I only planed one face side.
Some edges got planed but I noticed not all the nails had been pulled from said edges so rather than spend a bajillion hours hunting and yanking nails, no other edges were planed. And no, they weren't trimmed nor jointed* either.
But I point out that yes, only one side of the wood was planed as for sure this will rage woodworkers and carpenters. So be it. I will ignore your yelling-at-me comments, fyi.
I was not seeking perfectly re-milled, perfectly cleaned up, perfectly square, brand new lumber which I know rings confusing. To me, using wood this old is unique; I didn't want to erase its entire life.
Did this mean every piece was a different thickness, some were twisty a bit, edges and one face left as-found, dirty, gaps, divots, splintered areas, burnt and/or charred, ratty, and anything but perfect? Yep. That's how I wanted it.
I see you backing away slowly but wait.
After the wood was planed it was time to measure five million times, cut once as my stock was my stock, there was no more to be had. No messing up.
Until I messed up the first cut. Then panicked.
Focusing harder, my pile of long boards became piles of shorter boards. Two boards per tread and forty inches in length. Trust me, given how screwy everything is in this house, I measured* multiple existing treads before cutting.
Next up, gluing and clamping. I seem to be missing pictures again.
Each pair of boards were butt-joined and glued together with Gorilla glue.* Sounds scary, especially with janky edges that didn't inevitably meet well, so I whipped out the pocket hole kit* and sank some screws for added assurance.
Clamped* everything together, let it set overnight, or more accurately, until the next time I could get down there.
Was this enough? It had to be.
Once set, it was time to sand. Thankfully the weather turned nicer so I annoyed the crap out of our neighbors for two days and sanded* outdoors on the back deck. Which sure, meant I was hauling the wood in and out, up and down the basement stairs so many times, it was truly absurd.
 |
| So funny how the palm sander (still) has that sad face on the side. |
Some hundred grit, then two twenty grit, then hopped directly to eight hundred grit.* Baby's butt smooth.
Next up, time to stain so that meant wood conditioner.* Because staining pine, as we've learned, is not necessarily an effortless task.
That wood conditioner by the way, during my original tests, is what instantly prompted me to go with natural stain,* i.e., zero color at all.
When that wood conditioner hit that 1898 wood, whooie, it was like uh, um, wood porn (eeesh, creepy!) how beautiful that wood was, oh my goodness. No way was I going to bury that grain in color.
Sure, that meant I now had to be mindful about this entire design veering Northwoods Cabin on me. Nothing wrong with Northwoods Cabin mind you, of course; just not where I'm trying to take this house.
All right, so a coating of wood conditioner, let that condition, then onto the stain. Fyi, both my conditioner and stain were oil based. Why? I personally find waterbased stains to be dull, lifeless, and flat; merely a subjective preference.
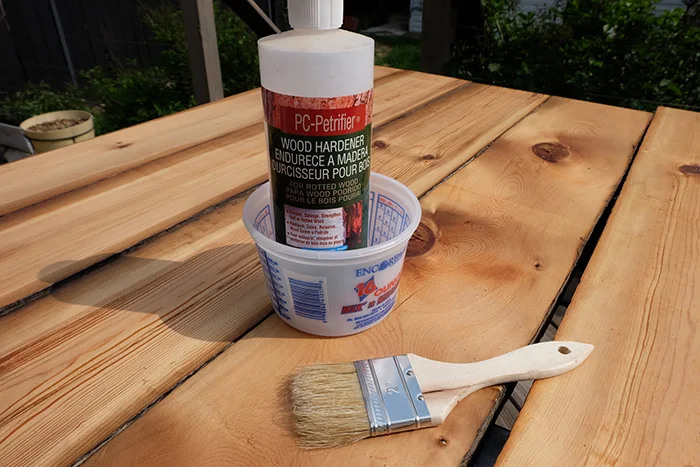
After the stain was wiped and set, I added a phase to the process: wood hardener.*
Soft pine, right? In using the wood hardener, the objective was to pump strength and durability into the pine.
Though it did just now strike me that I used a water based hardener over oil based goo. It did work in my tests. Hm, I did not test the process the other way around, hardener then stain, but I probably should have. I assumed it wouldn't work. Doh. Doh. I will test.
Two coats of hardener, splish splash (now my fingers are very crossed) and once dry, the next step....
 |
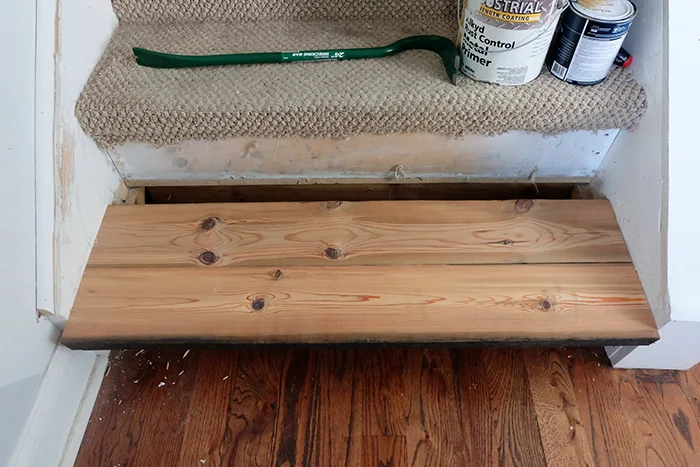
| (Test fitting an unstained stair tread here to give you impetus to keep following along! Bonus: my new favorite tool.*) |
.......that's the biggie, the eternal dilemma and the challenge: let's make these stair treads non-slip. How did I do it without a runner or sticky treads, just plain bare wood? That's next time on the DIY Stair Project!
*The planer, jointers, natural color stain, and my new favorite tool are Home Depot affiliate links. The stair runners are a Wayfair affiliate link. The Gorilla glue, tape measures, pocket hole jigs, palm sanders, and wood hardeners are Amazon affiliate links. The clamps, sandpaper, and wood conditioner are Lowes affiliate links. Mwah, thanks! Please see the "boring stuff" tab for more info.


Post a Comment
Please no spam or links, thanks!