We all wish we could live near some water, amirite? Some of us out there are lucky enough to do so (and hey, can I come visit?). For those of us who are more landlocked, fountains can ease the daily grind.
But what if your location is power-free? No problem. Get a nifty solar fountain.* Just FYI though, they do not hold a charge meaning they only run when the sun is out. Meaning, not at night and may struggle in clouds.
Regardless, how cool is a solar fountain though?! They're mostly intended for birdbaths but who cares. Adaptation is the name of the game on this ol' blog.
I've kind of always wanted a water feature of some sort in the yard as an Aquarian although now I see, heh, technically it's an air sign? I don't follow astrology, and no offense. Well, water. I like water.
Part of the issue of course is mosquitoes. Dreaded dreaded Becky-eating mosquitoes. I am a mosquito magnet.
Plus too, I don't want to treat any water in case Finn or another animal drinks it.
And lastly, Mike is a no-go on a yard water feature. So, there's that. No worries.
But a fountain that's not only portable but is small, tabletop, and easy to maintain? No problem!
For this project, here's what I used:
- three foam rings*
- 9 1/2" clear plastic terrarium dish* (from the dollar store*)
- construction adhesive*
- powdered joint compound*
- latex paint
- sandpaper*
- spray primer*
- skim coat concrete/patch*
- acrylic spray sealer*
- plastic dog bowl* (from dollar store -- can use stainless too. Test it, make sure it fits a ring.)
- black spray paint for plastic*
- solar birdbath fountain*
All right!
First, grab your three foam rings and the plastic terrarium thingie. You can go without the plastic dish or invert it as I had originally planned. I opted to use it right side up in case I wanted to toss some weight in the bottom to keep this from flying off in the wind.
Glue the rings together and into the terrarium thingie with the construction adhesive, cleaning up any excess that squirts out. Let that dry.
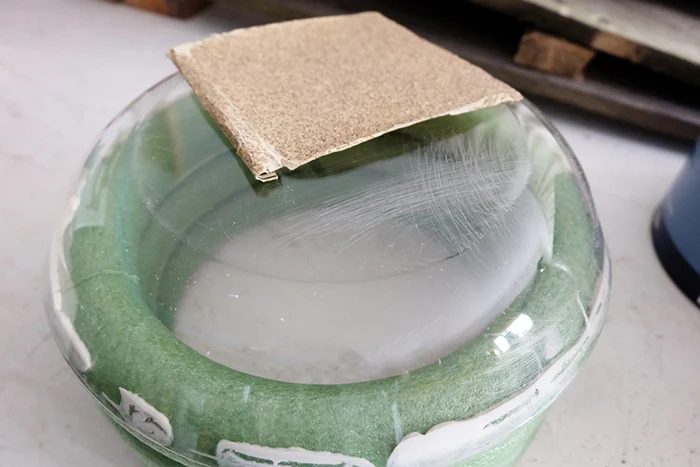
When it's set, scuff up the terrarium thingie with some gruff sandpaper, like maybe 60-80 grit. Just scratch it up so that stuff will adhere to it. Spray prime a light coating to give the plastic more grippy power.
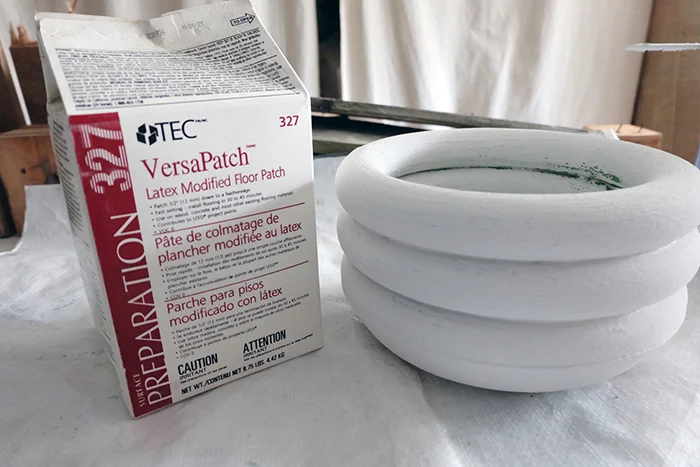
Next, instead of buying Foam Coat* which is stupid expensive, let's employ an old theater trick to make our own for far less and to yield far more. How to? Mix 50/50 powdered joint compound and latex paint.
Smear that onto the foam rings and onto the plastic base thingie. You can attempt a super smooth coating or go for somewhat rough, or totally rough, it's up to you. For smoother, try a slightly water-dampened chip brush to clean up any rough spots.
Let that dry.
Feel free to sand down any rough spots or bumps here.
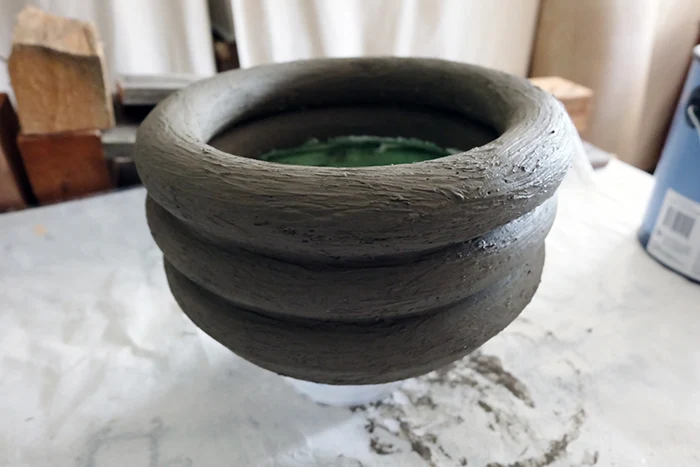
Next up, the skim coat concrete. Mix some up according to the directions and smear that on top of your foam coat. Same deal -- get it as smooth as you'd like or as rough, totally up to you again.
Let that dry.
Again, feel free to sand down any rough spots or bumps, or leave it be.
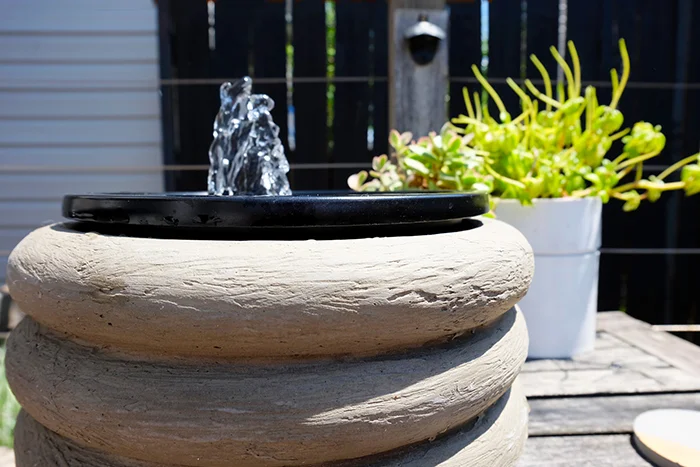
Lastly, give the whole thing a light spray of the acrylic sealer. While this does not create a truly weatherproof finish, it does protect your hard work some. Your faux concrete tabletop solar fountain base is complete!
Now take that dog bowl and give it a couple light coatings of spray paint that's for plastics, if you'd like. This is not necessary but I wasn't keen on the existing white bowl with the black solar fountain. I figured the contrast would make me bonkers.
Let that dry.
Heh, lots of letting that dry here.
Now all you've gotta do is assemble!
This particular solar fountain that I purchased has bitty suction cups on the bottom so it sticks to the bottom of the bowl. Make sure, ha ha, you don't opt for spray attachments that shoot water all the heck over the place.
And tada!
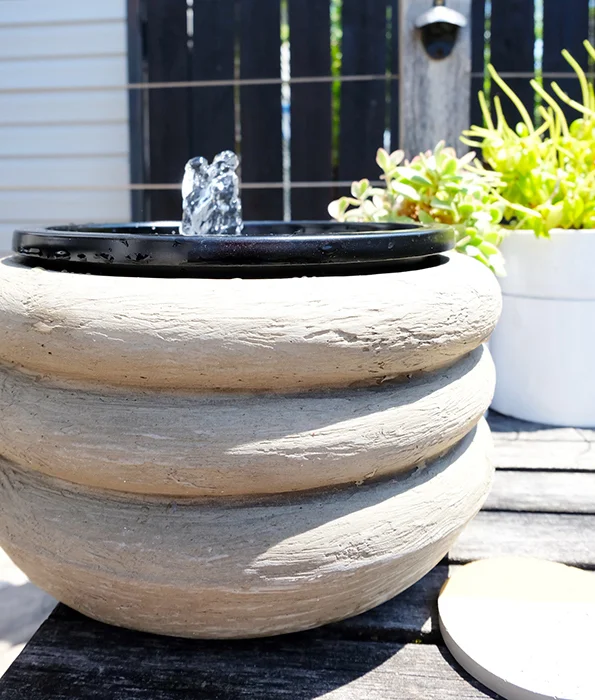
It's a cute little portable faux concrete tabletop solar fountain! A water feature! For our yard!
I will say, again, the fact that the gizmo doesn't hold a charge therefore only runs when there's direct light is a bit of a bummer in that we can't enjoy it outside in the evening but, fountain!
 |
| Yeahhhh, I didn't do the gray stain under the handrails. |
Super easy, right?
Looks nice sitting with our little DIY PVC pipe fittings outdoor planters!
Heh, I sat and enjoyed the gurgle for a little bit. Such a relaxing, peaceful sound!
Here, I even made a whole video of the entire process! A video, Iiii know, can you believe it?
Ok! Hope you are thoroughly inspired to create you own faux concrete tabletop solar fountain now!
*The solar fountains, terrarium dishes, Foam Coat, sandpaper, and dog bowls are Amazon affiliate links. The foam rings and terrarium dishes are Dollar Tree affiliate links. The construction adhesive, powdered joint compound, and spray primers are Lowes affiliate links. Skim coat concrete and spray paints, those are Home Depot affiliate links. The acrylic spray sealer, that's a Michaels affiliate link. Mwah, thanks! Please see the "boring stuff" tab for more info.








That's EXACTLY what I need and it seams that I can actually pull it off for real. I can see all sorts of possibilities with the container AND maybe I can use all the shells collected for just this sort of project. Thank you for the inspiration and for making concrete less intimidating.
ReplyDeleteYesssss, excellent! I'm so thrilled that not only do you feel you can pull this off, that concrete is not scary, but also that you see the multitudes of ways this can be adapted! Doing a happy dance here and I hope you have a great time with your version!
DeleteThis is the look I'm after (with your water feature) do you think it's doable with concrete: https://www.1stdibs.com/furniture/building-garden/planters-jardinieres/mid-20th-century-french-cement-planters-embedded-shells/id-f_7574553/
ReplyDeleteOh that'd be cool! Yes, absolutely though you might try gluing the shells on first then use the skim coat like a grout, as one would for say, a tile mosaic as it's likely not sticky enough to hold the shells on its own. Fun project, that'll be neat!
Delete