This project, well, this dilemma was long overdue in resolving. Long. And now it's resolved! Yay! I'm really excited about this one, if you hadn't noticed already.
First, mostly, I'm shocked. Why? Because these turned out exactly like store-bought floor cushions. Somehow I didn't muff this up and was able to pull them together in stellar fashion. I'm super proud of myself a. for a job well done and b. I finished a project.
We've all seen these floor cushions around, they're all the rage and I must admit, I'm a long time fancier. So much so I was waffling whether to just purchase and be done with the dilemma but honestly, I couldn't justify the forty dollar plus per cushion price tag.
See, we used to have some pillows we'd plop our butts on on the floor to watch television and eat. I'm unsure what transpired with those pillows though I feel they disappeared after we lost Hailey.
Sore hearts and sore butts since.
With the arrival of our Tumble rug, our butts are a wee closer to the hardwood floor so the floor cushion need bubbled up to the Pond of Things-to-Do surface sloshing in my head.
Perusing the interwebs for solutions, I of course was yet again drawn to these dang tufted floor cushions and yet again, meh, pricey.
Until. Until I ran across several tutorials online where omg I could make them! And they'd be custom! The size, the fabric....omg! Get to the store!
Excitedly off I ran to Textile Discount Outlet where I proceeded to spend two hours roaming only to unbelievably leave empty-handed. Well, other than a huge bundle of weird batting for twenty bucks.
Forlorn, I bucked up and dashed over to Joann Fabrics.
See, I was hunting for a fabric that was fun, easy to work with, durable, easy to work with, reasonably priced, and easy to work with.
In the end, I hit three of the four, compromising on the fun as anything that was fun was holy heck like sixty bucks per yard. What the......When did fabric prices go gaga?! Jeez louise.
Anywhooo. Right, here's what I used to DIY these tufted floor cushions which may vary depending on how you decide to accomplish this:
Many of these items were on hand already, only needing the fabric, fill, and embroidery floss so my total project cost was in the neighborhood of twenty bucks.
Yes, to DIY tufted floor cushions, my expenditure was half the price of a single store-bought one. Niiice.
Ok, so this is not complicated but does require a smidge of patience. Not in bad way. I mean c'mon, in the end you've got custom DIY tufted floor cushions!
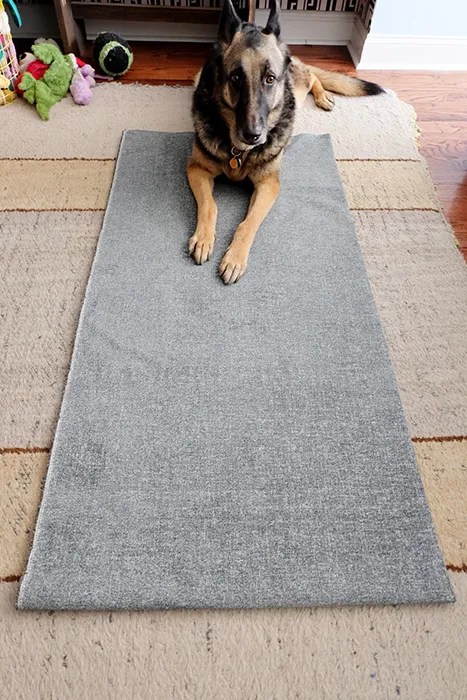
Start by determining the size cushions you want. In our case, though I goofed and went 24" square first then realized my mistake when it came time to stuff (oy me holy seam ripping*), I needed 24 x 18.
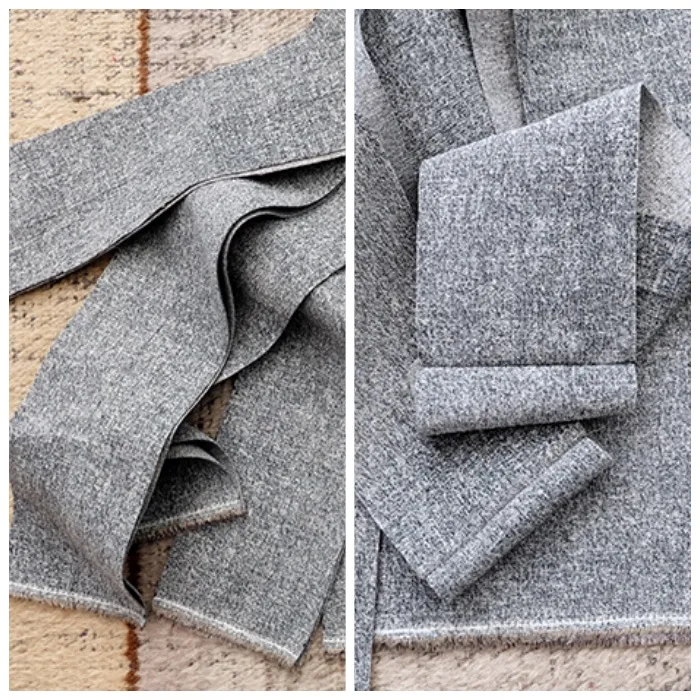
If you have enough fabric to do the side pieces all in one length, go ahead and cut those first otherwise, as in my case with my 60" wide fabric, I cut four strips at six inches wide then stitched* the ends to make two long pieces.
All right. Next, cut your cushion panels and don't forget to add a half inch for seam allowance on each side. So for mine, I cut four panels at 19 x 25.
Time to pin! Aw man, pinning, bleech, but, it's key to keeping things aligned so gotta do it. Pin a strip of the side pieces along the edges of the cushion panel with the good sides together. Yes, the corners will be the trickiest.
Next, stitch the side piece to the cushion panel with a half inch seam. Yes, again, the corners will be the trickiest. It's a matter of creatively flopping fabric around.
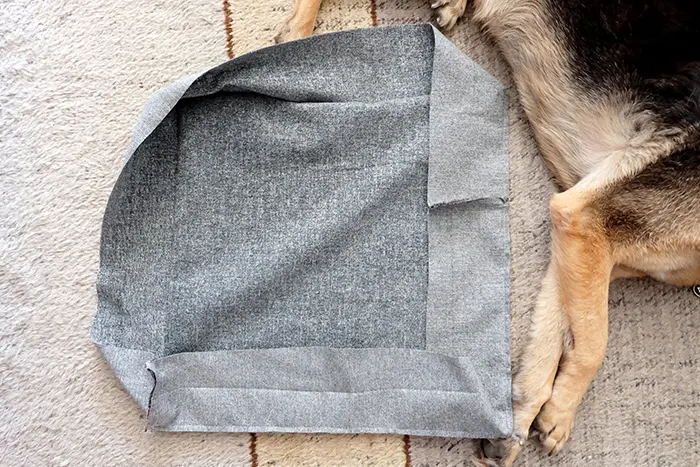 |
| Same deal, wrong sized one but stitched nonetheless. I left the side pieces long, uncut then stitched them at the right spot for the fourth corner because I goofed, math error, and cut them too short. Doh. |
Once that's done, repeat with the other cushion panel but this time, make sure to leave a decent sized opening at the end to flip the fabric inside out and for cramming full of stuffing.
Which is of course the next step! This huge roll of batt was thumbs up for me but if you're doing fiberfill, it may take three to four bags per DIY tufted floor cushion to fill, depending on the size you made.
Next, stitch the stuffing opening shut with a blind stitch. Truly the best thing I ever learned in junior high. Probably the only thing I remember learning in junior high.
Nice, right?! Almost there!
Now to decorate.
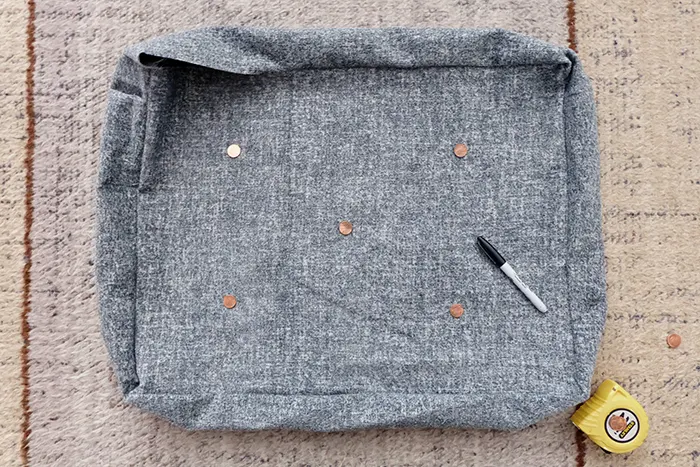
To decide how many tufts in the cushion body I wanted, I used some pennies and switched them around.
Once I had a design I liked, I measured in six inches from the short sides and five from the long then also at center, made some Sharpie* dots, and grabbed the longest needle I had which apparently are called doll needles.
From here I used bright yellow embroidery floss in the hopes of seeing little snippets of color but you can use butch thread. Thread up your needle, poke through the mark to the other side, pull through, tug tight, then stitch back and forth through a couple times. Knot off (which I found switching to a curved upholstery needle helped tremendously).
Make sure you've knotted the start end with a big bulky knot so it doesn't pull through, fyi.
Repeat!
Ok, for the part we've all been waiting for, the DIY tufted edges! Who knew this was so freakin' easy?!
Here I used the curved upholstery needle again but a straight needle works fine. Start in a corner to hide your knot, sweep through the inside to about an inch from the seam into the cushion panel, pull through.
Make a small straight stitch across then sweep through the inside on an angle about an inch away from the seam on the other side and about an inch away from the small stitch, pull through, and yank taut. You'll be yanking and tightening as you go which forms that beloved tuft.
 |
| Clockwise from top left: start at the corner; make a small stitch then go under the seam on an angle and out into the side; repeat and pull very tight. |
You can measure out and mark the spots ahead if you're looking for exactness but given tufted's nature, I winged it.
Once you get to another corner, knot off then continue on.
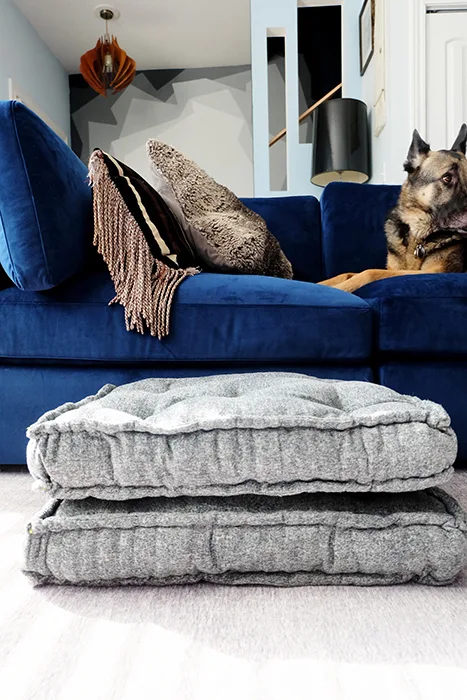
Then wow! Holy schnizzbit, you've got store-worthy tufted floor cushions that you DIY'ed and you should be so very very proud!
And darn it, I'm proud! I cannot believe how well these turned out. Mike as well as our butts were suitably impressed too, yay!
Tada, a how to DIY: tufted floor cushions!
Finn! Gosh darn it, haha! He is my shadow, obviously.
 |
| Finn does love this couch! |
So easy, right?!
 |
| Bonus! They store perfectly under the coffee table out of the way! |
Have fun with this one!
*The fabric, thread, straight pins, and fiberfill are Joann Fabrics affiliate links. The doll needles, upholstery needles, seam rippers, sewing machines, and Sharpies are Amazon affiliate links. The embroidery floss is a Michaels affiliate link. Mwah, thanks! Please see the "boring stuff" tab for more info.








Nice! Now you can come over and complete my slipcovers for the 6 patio chairs that have not been finished for 2 seasons----well really only 5 since I did complete one. And the worst part is that the other 5 are all cut out and ready to be sewed. UGH!! Finishing the project is the hardest part! KUDOS to you for completing it and having it look so good!!! YAY!
ReplyDeleteWell that is one heck of an invitation! I hear you -- finishing is the hardest part for sure but I have complete faith, I know you can do this! Thank you for the project completion kudos and thank you, I'm thrilled you like them! Go get 'em!
Deletesorry, I forgot to put my name 😊😊
ReplyDeletehaha, no worries!
Delete