Yes, another scrap wood DIY how-to today!
Seriously, I know. But hey, I’ve got too much
scrap wood. So all right, let's make tray picture frames!
I will gush momentarily, these are snazzy. Especially since you can
customize them any which way until Sunday. Into the next week even.
Truly the possibilities are boundless here.
Ultimately I should thank two things for this project, well ok, three:
Glenfarclas
then my new
Bora wall mount storage rack* then the Mackintosh House gift shop. And ok ok, four:
myself.
In mixed up order? Myself: I finally cleared out the monster mess
of scrap wood buried in
my rolling door work table. What a feel-good moment that was, whew, wow. Check and mark.
My new storage rack: that’s where most of the wood went so not only is
it organized, it’s organized
by type and kind And best of all, I can very clearly see what the
hell I’ve got so I can actually use it. Nice.
Two pats in the back there, yessir-y. Maybe three as the rack was easy
to install, got it up in no time with some big butch screws. Big butch
screws are fun.
Ok, Glenfarclas? Well obviously that’s what
got me over to Scotland
in the first place, so ongoing and forever grateful thank you’s there.
Lastly, the
Mackintosh House at the Hunterian, the gift shop.
I very distinctly remember way back in college, eons ago, sitting in an art
history or architectural history or something class, my jaw slow-mo dropping
agape as slides of
Charles Rennie Mackintosh’s work appeared on the screen.
Yes, I’m sitting in class, the pen droops to my notebook, “I must…I…I have to
go there someday.” Rest of the slides? No idea.
To be amongst his and
Margaret Macdonald Mackintosh’s work, his wife,
standing there in person
was a decades-long dream come true. I near about cried. I’m a dork, what
can I say.
Honestly, I’m still speechless about being in the main rooms' reassemblage of
their home. Chills and goosebumps, chills and goosebumps.
Somehow
my cool woodworking friend Scott
and I managed to tear ourselves away from the tour and of course, gotta hit
the gift shop, c’mon.
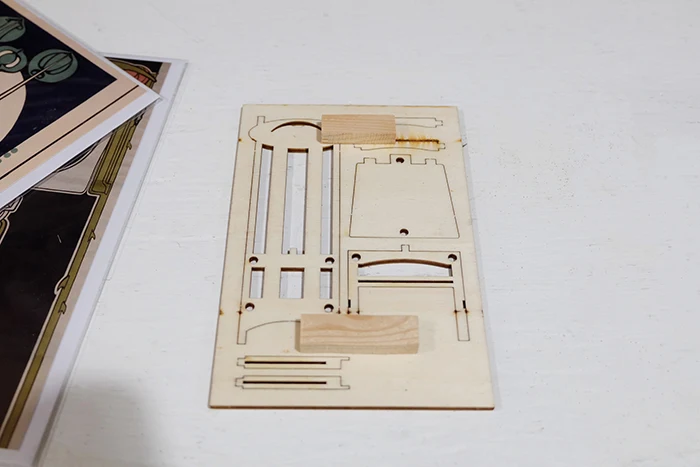
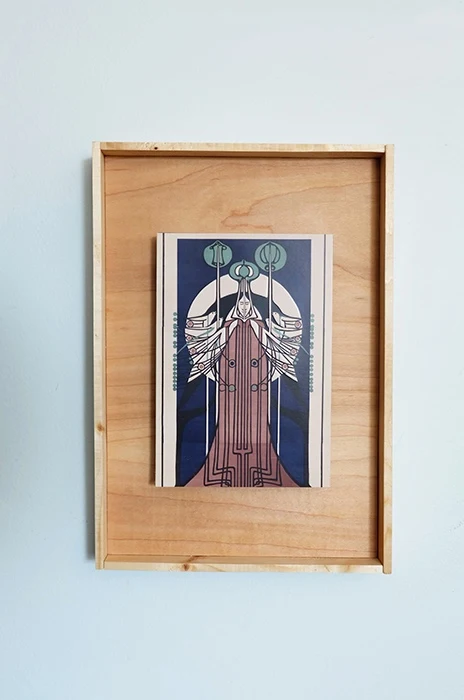
I bought too much, surely, including two greeting cards and a wooden postcard
that punches apart and assembles into a mini version of their
famous chair, all of which have sat tucked away collecting dust.
In search of a scrap wood, inexpensive, easy DIY project, it was time to give
these items their due.
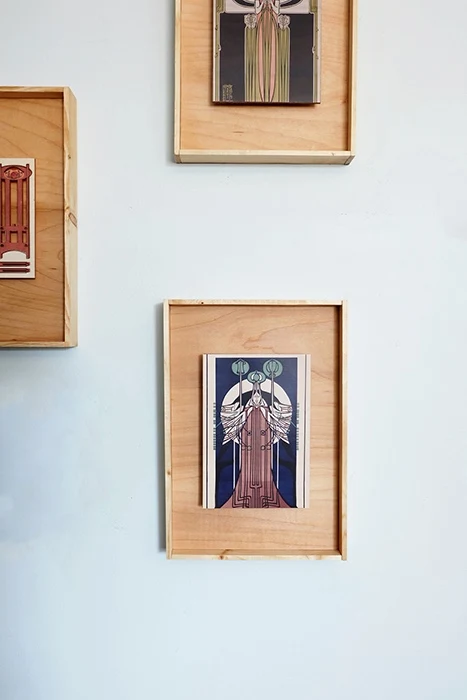
So there it was: scrap wood DIY tray picture frames.
Not too dissimilar from
the printable frames
in theory but distinctly different.
Here’s what I used:
- scrap 3/4” plywood
- wood lath
- wood glue*
- spray mount*
- glue stick
- scrap Masonite and wood bits
- tung oil*
Was the 3/4” thickness of plywood overkill? Sure. But, scrap wood
got used for a captivating project and I made the thickness work in my favor
in assembly.
And wood lath? Oh my gee oh dee Becky, with the
wood lath…Honestly it’s like dust bunnies — every time I try to use it up, I have to
buy more to finish said project. Crazytown.
Real simple here, friends. We’re basically making a tray that instead of
using as a tray, we’re using it as a picture frame.
I pretty well went with the sizes of plywood I had on hand as they were
magically perfect dimension-wise, save a little trimming to straighten or
slice into two.
Picked up this
lil’ saw guide
which I couldn't get to work terribly well with either my
compact circular saw* (ddin't clamp on entirely) or my
jigsaw*
(blade was bendy). Maybe I need a
different one.* Got too frustrated with it, taking too much valuable time, tossed it
aside.
Anyway, with the panel pieces cut, I trimmed up the wood lath to make the
frame.

|
| Hot tip: line up the wood lath and mark it to match the plywood, no measuring required and you get exact lengths. |
Gave everything a decent sanding next. Super easy, of course.
To attach, I used glue. Yes, nails work, fancy joints like dovetails
work, angles work, but I was going for fastener-free visuals and eh, I’m not
skilled enough to make dovetails, wasn't into angles that day.
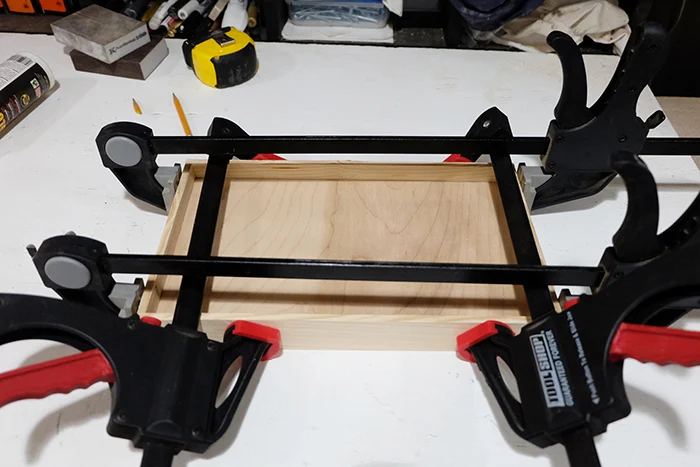
Fold the wood lath up and around,
clamp*
everything together....
Right, ok, wow, yeah, that’s it. Huh, that was fast!
To hang them, all I did was drill holes in the back so these scrap wood tray
picture frames could sit tight and flush to the wall. What’s easier than
holes? Not much.
Sealed the wood up with tung oil. You could paint these, stain them,
put wallpaper or fabric on the tray panel for contrast, ya know, infinite
possibilities.
Ok, the how-to on mounting the cards.
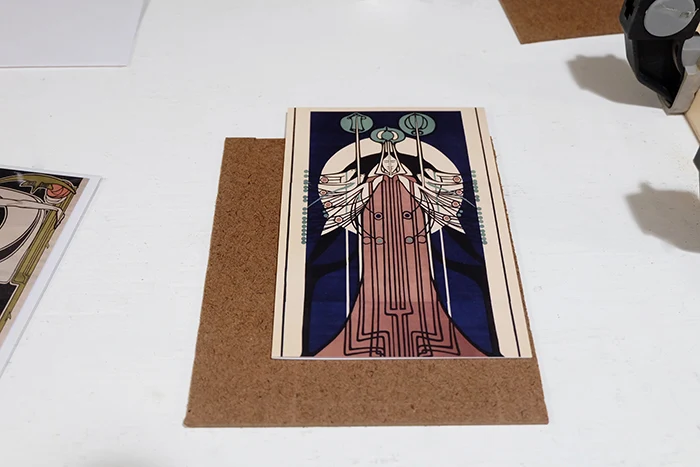
Here I adhered the greeting cards to scrap
eigth-inch thick Masonite
using spray mount after gluing them shut with a
glue stick.* Spray mount is super messy sticky stuff so feel free to use rubber
cement,
Mod Podge,* or even
photo tape* for your artwork.
Rather than sticking the cards directly onto the tray panel, I opted for I
guess a shadow box?, no, what are the words I’m looking for….eh, whatever, I
opted to stand the cards off the tray panel backing so they extra pull focus
and the added depth is like the “design in 3’s” third or however that’s
phrased. I need a nap.
Right.
For the cards, I glued scrap wood bits on the backs, half inch thick, measured
for even, straight placement, then glued them on. Yup, simple.
Yes, glue's a pretty permanent choice; you do you.
For the wooden postcard, I did the same but with scrap wood lath bits, a
quarter inch thick, and stuck that on.
So now I’ve got three fancy pants, snazzy, stylish, chic, modern tray picture
frames made of scrap wood, all free to me, and now you have a spiffy how-to
DIY tutorial!
Right?!
Love it. Love it! Three cheers for me! Now get out there
and dig through your scrap wood collection, see where this inspiration takes
your imagination!
Have fun!
If this project got you going, imagine what you could do. Download The $100 Room Glow-Up Guide and see what’s possible.
*The Bora wall mount storage rack, saw guides, Rockwell compact circular
saws, and glue sticks are Amazon affiliate links. The wood glue, Bosch
jigsaws, and clamps are Home Depot affiliate links. The spray mount,
Mod Podge, and photo tape are Michaels affiliate links. The tung oil
is a Lowes affiliate link.











lovely work! trying this out myself - just on a conservation level - much better to use ph neutral / acid free cards for backing - that woodlath stuff is full of crap and will turn you papers yellow in the long run unfortunately -
ReplyDeleteThank you! And fantastic, I hope yours turn out terrific! Thank you too for your conservation level points and in relation to the wood, those are very helpful to keep in mind. Thanks very much!
Delete